At MakeCU 2026, the Columbia University Robotics Club’s hardware hackathon, we ran a workshop on AI-native PCB design and the Built for You challenge: design a custom board for a real person’s real need, in Trace. SafeRoute, Vy Khong and Andy Deng from Drexel University, won. Their smart-cane sensor pod went from a breadboard and wires to a real, fully routed board, and we’re manufacturing it.
The workshop: AI-native PCB design
We opened the weekend with a 30-minute workshop. One real board, a USB-C temperature and humidity logger, went from a sentence to factory files in Trace: describe it, review what the AI drafts, run ERC, lay it out, check DRC against the fab’s rules, and export the outputs.
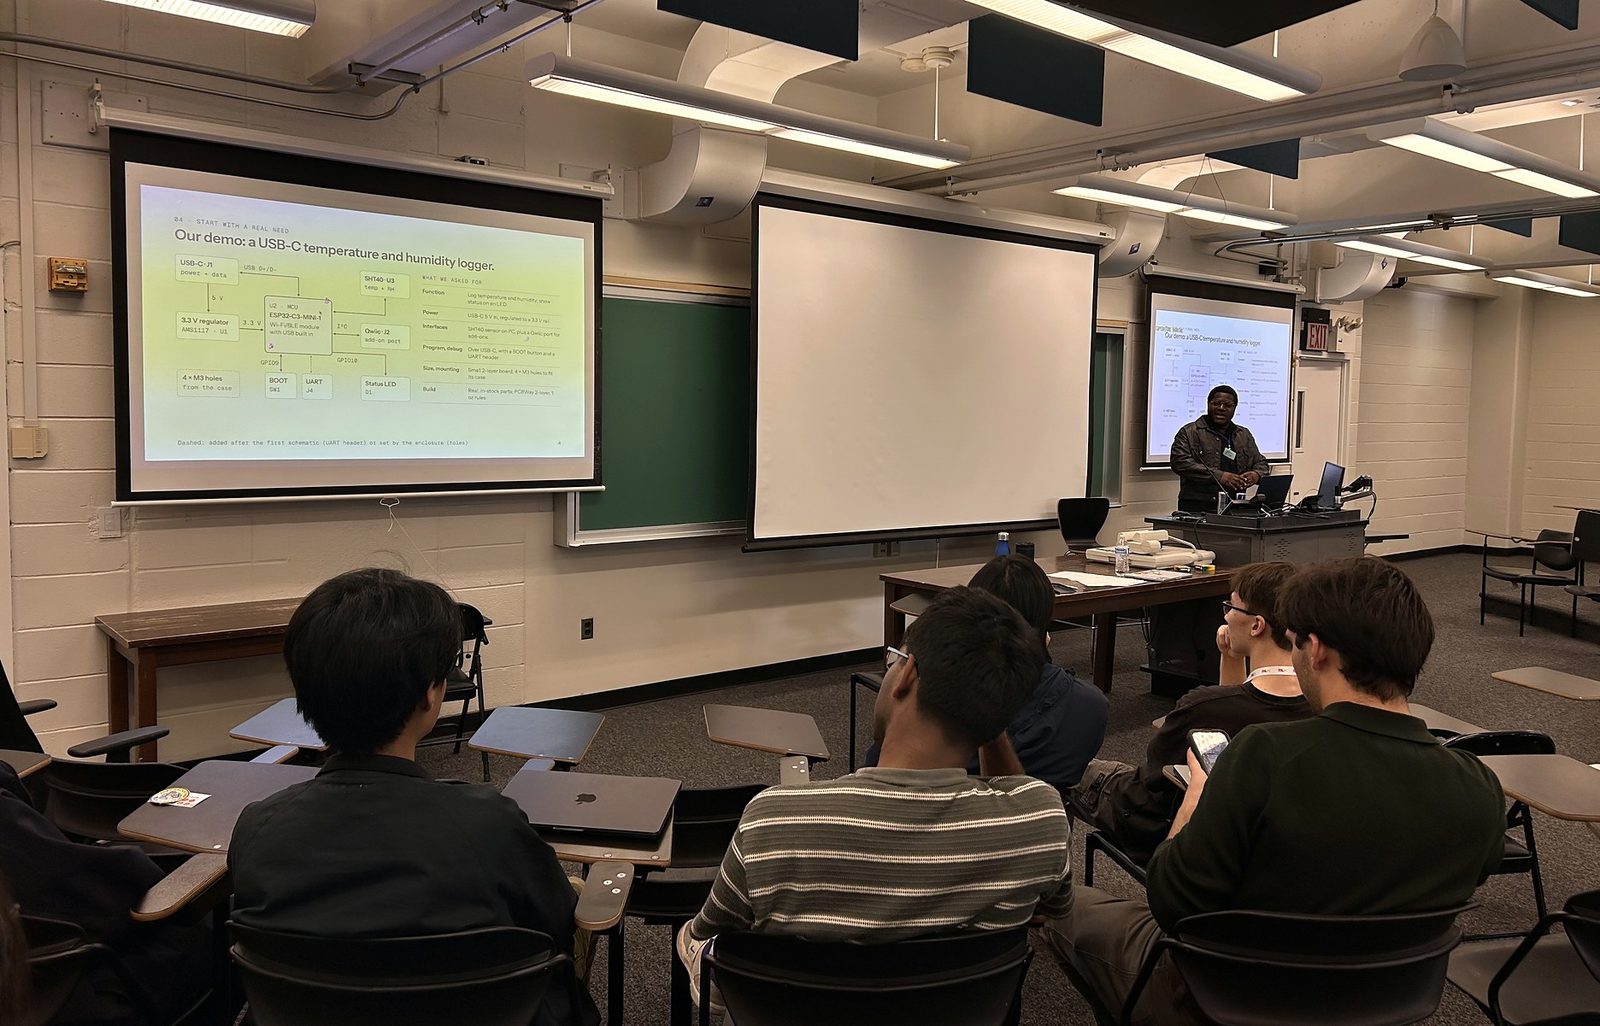
The point we kept coming back to: the AI drafts quickly, but you stay the engineer. You decide, you review, and you own the result.
The challenge: Built for You
Design a custom board for a real person’s real need, and explain why it should exist as a custom board rather than a dev board with wires. Teams of two to four, with at least one member who has electrical-engineering coursework.
- A real use case: who needs it, and why a custom board.
- Programmable hardware: a microcontroller you can flash.
- Real mechanical constraints: an outline, mounting and connector access that fit a real case or space.
- Design outputs: schematic, board, manufacturing files and a short explanation.
Two days in the makerspace
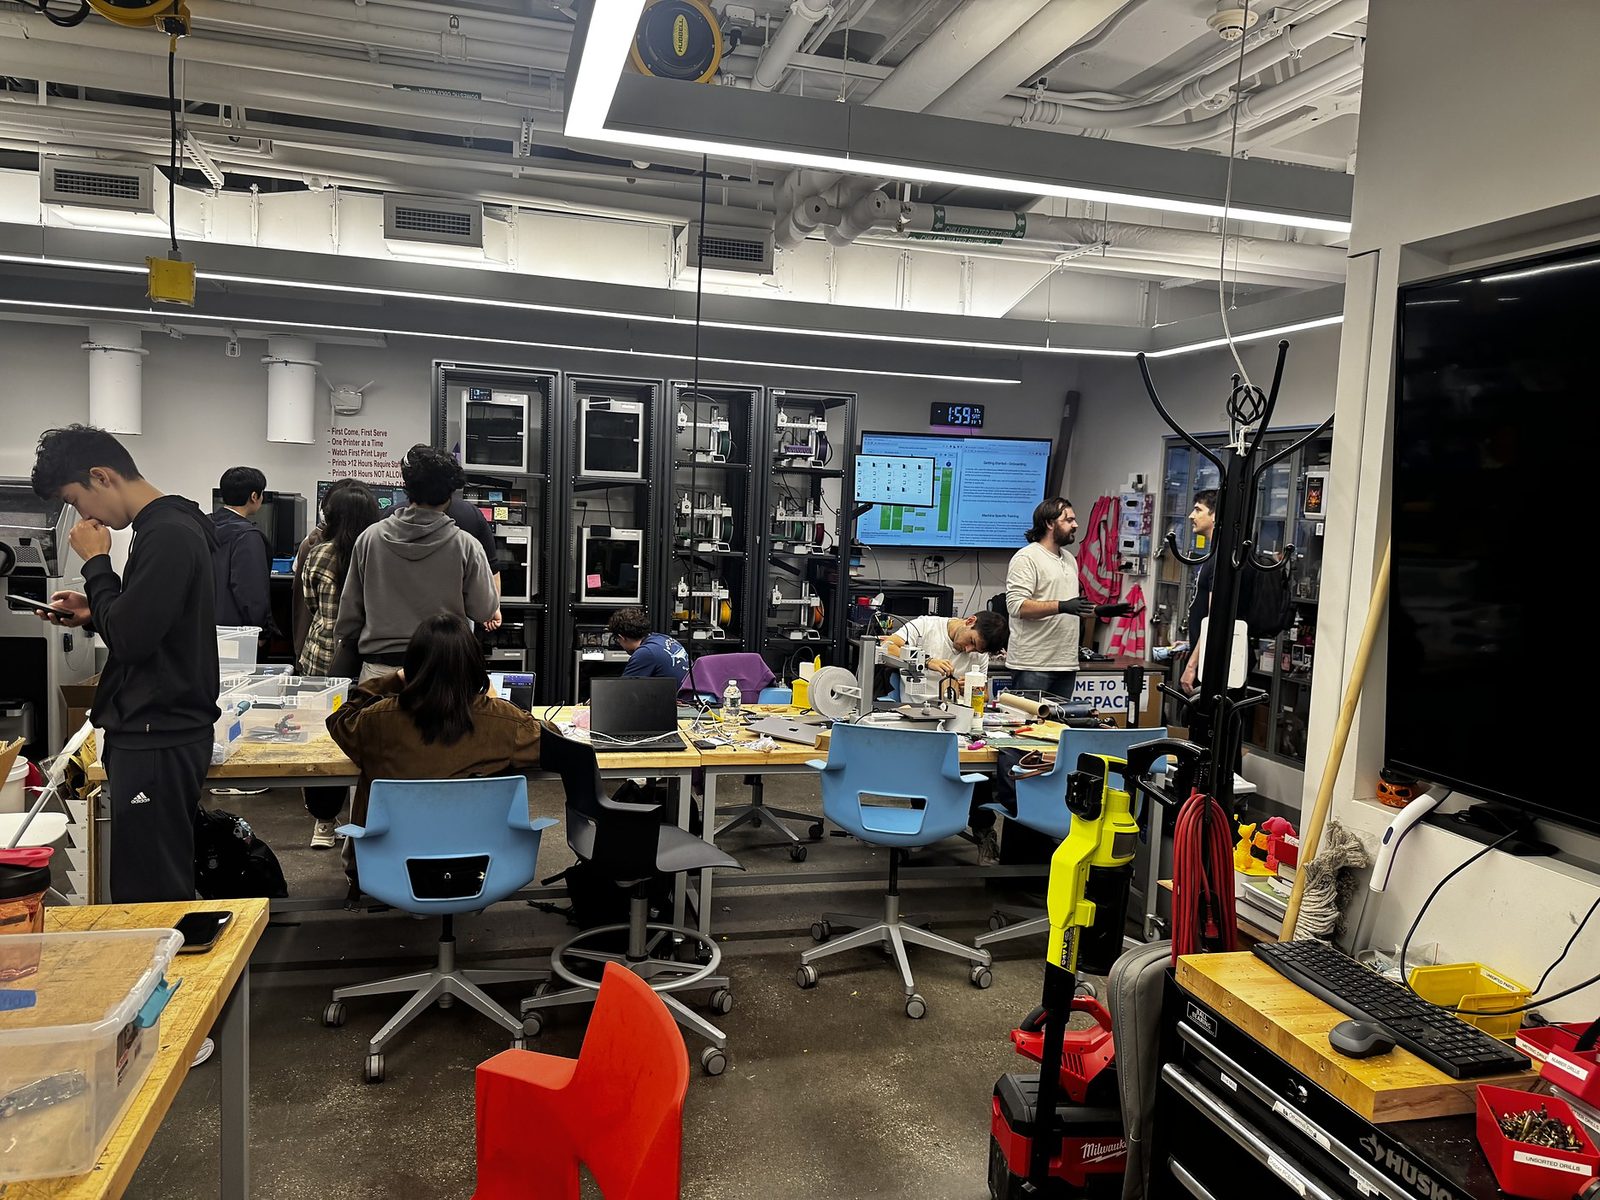
Then the teams got to work. They built their boards in Trace: the AI drafted schematics and layouts, and the students reviewed, checked and decided.
The winner: SafeRoute
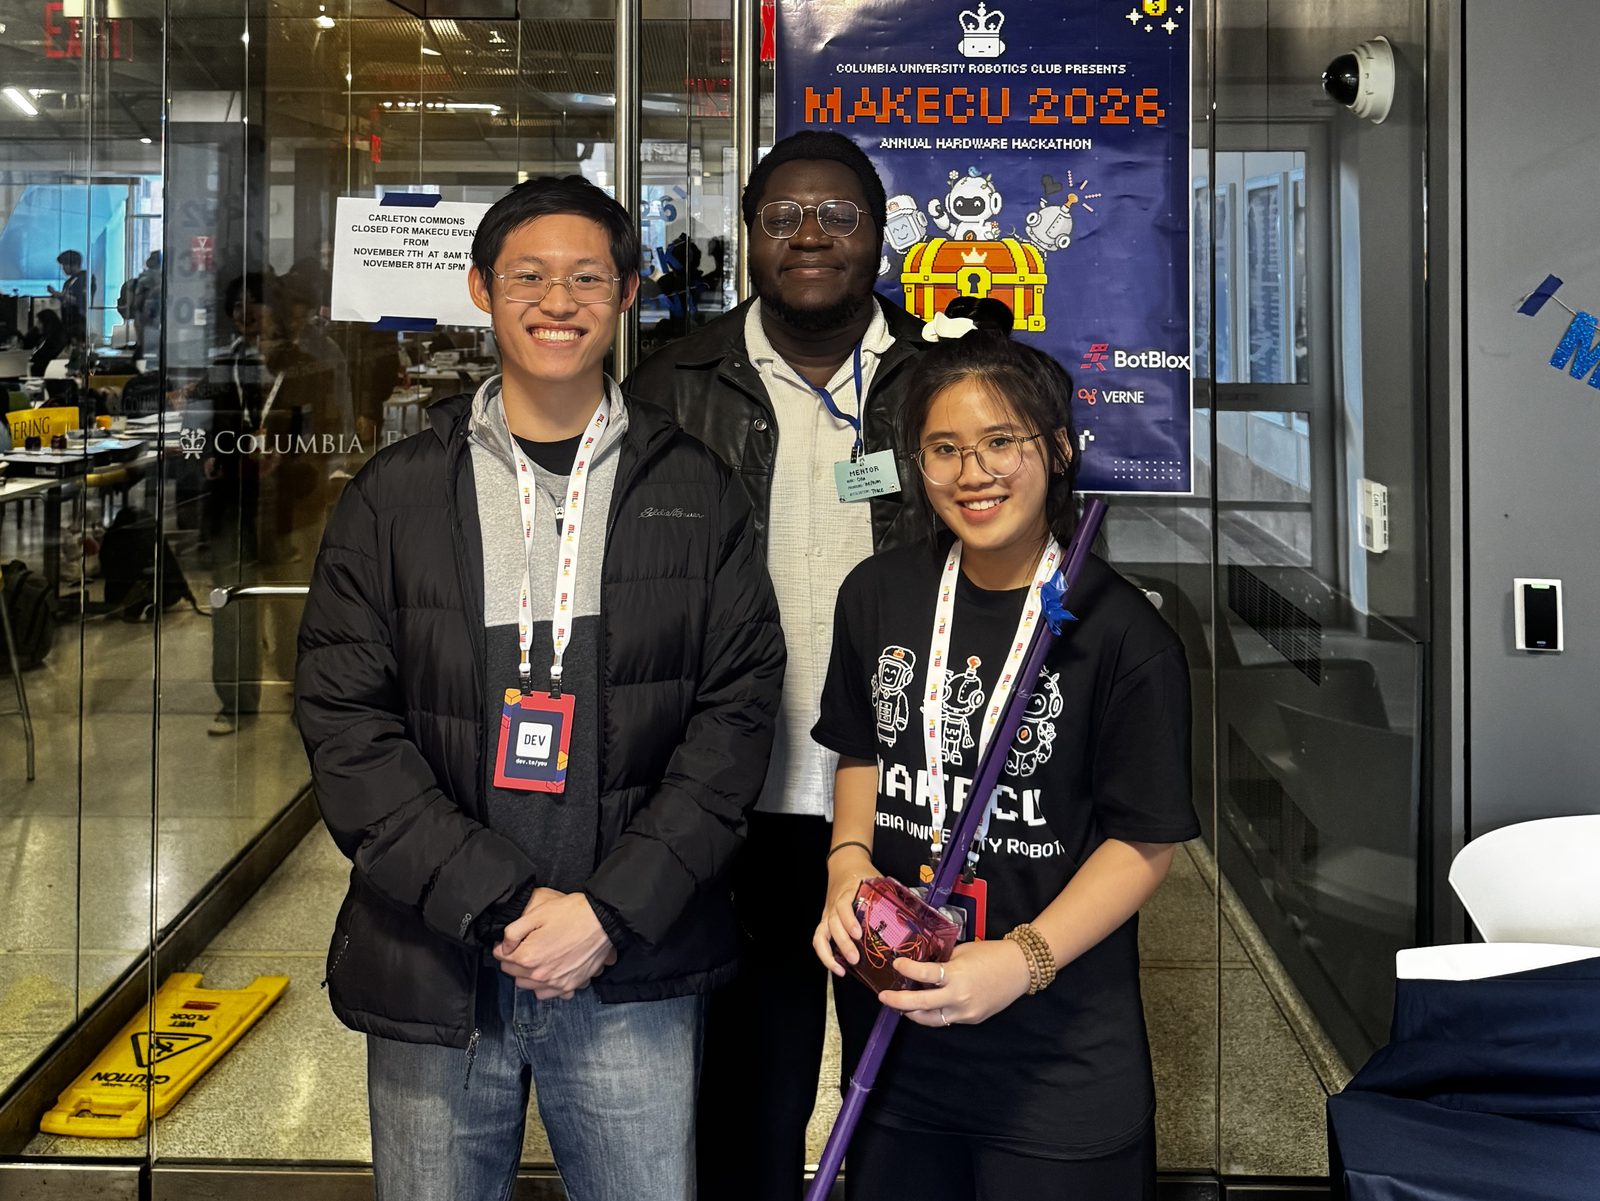
Vy and Andy came to MakeCU from Drexel University. Their project, SafeRoute, is a sensor pod for a cane. At the hackathon it started the way most hardware starts: a breadboard and wires on a cane, built and tested outside the lab.
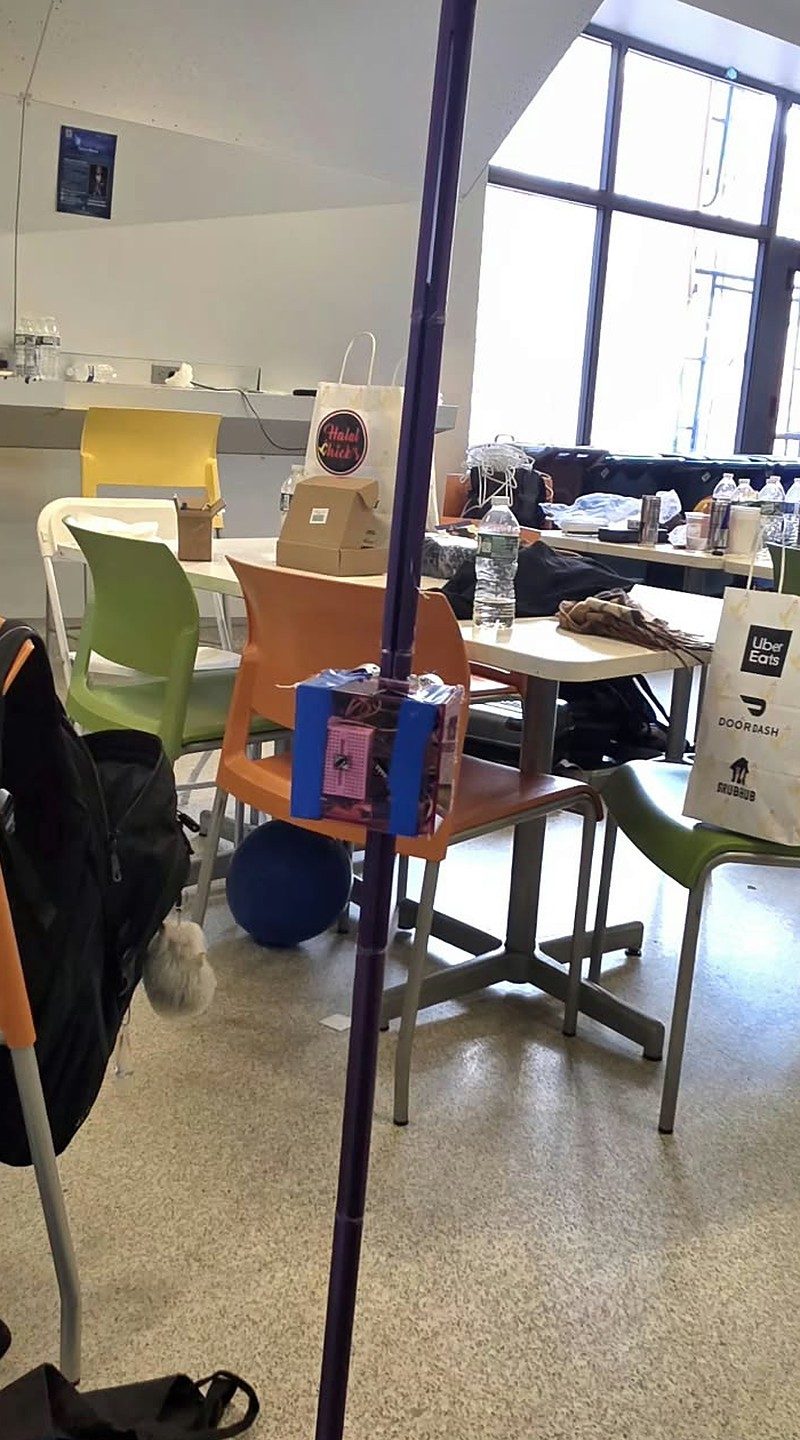
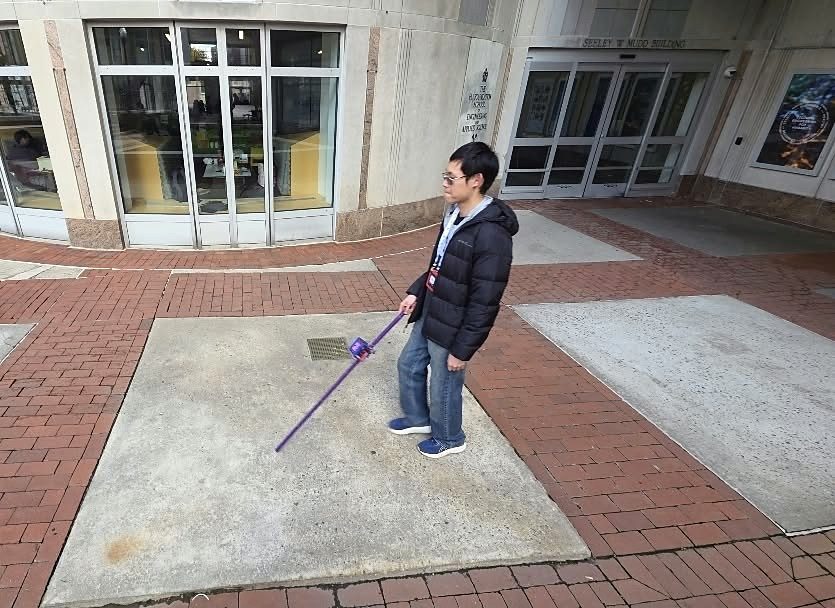
Their goal was to turn that wiring into one clean, reliable board. That is what they designed in Trace.
From breadboard to a real board
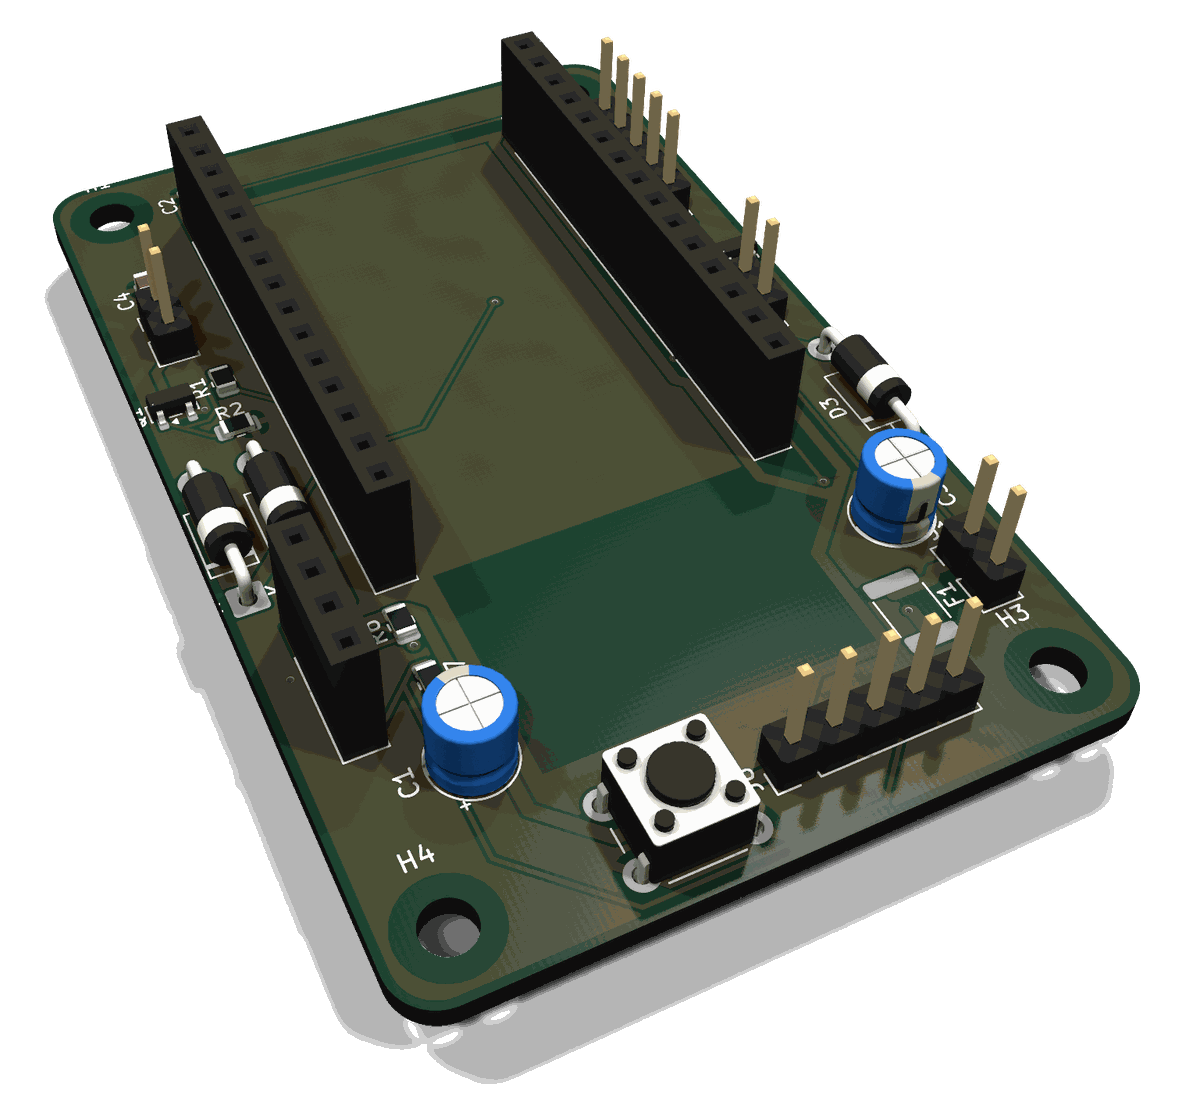
The SafeRoute Micro Pod is a carrier that an ESP32 DevKit plugs into. It feeds two time-of-flight distance sensors, one looking forward and one at the ground, an accelerometer, and left and right haptic motors, each driven by its own MOSFET with a flyback diode. A fused battery input powers the motors, and a button and four M3 mounting holes finish it off. The target fab is PCBWay.
The schematic: five blocks, ERC clean
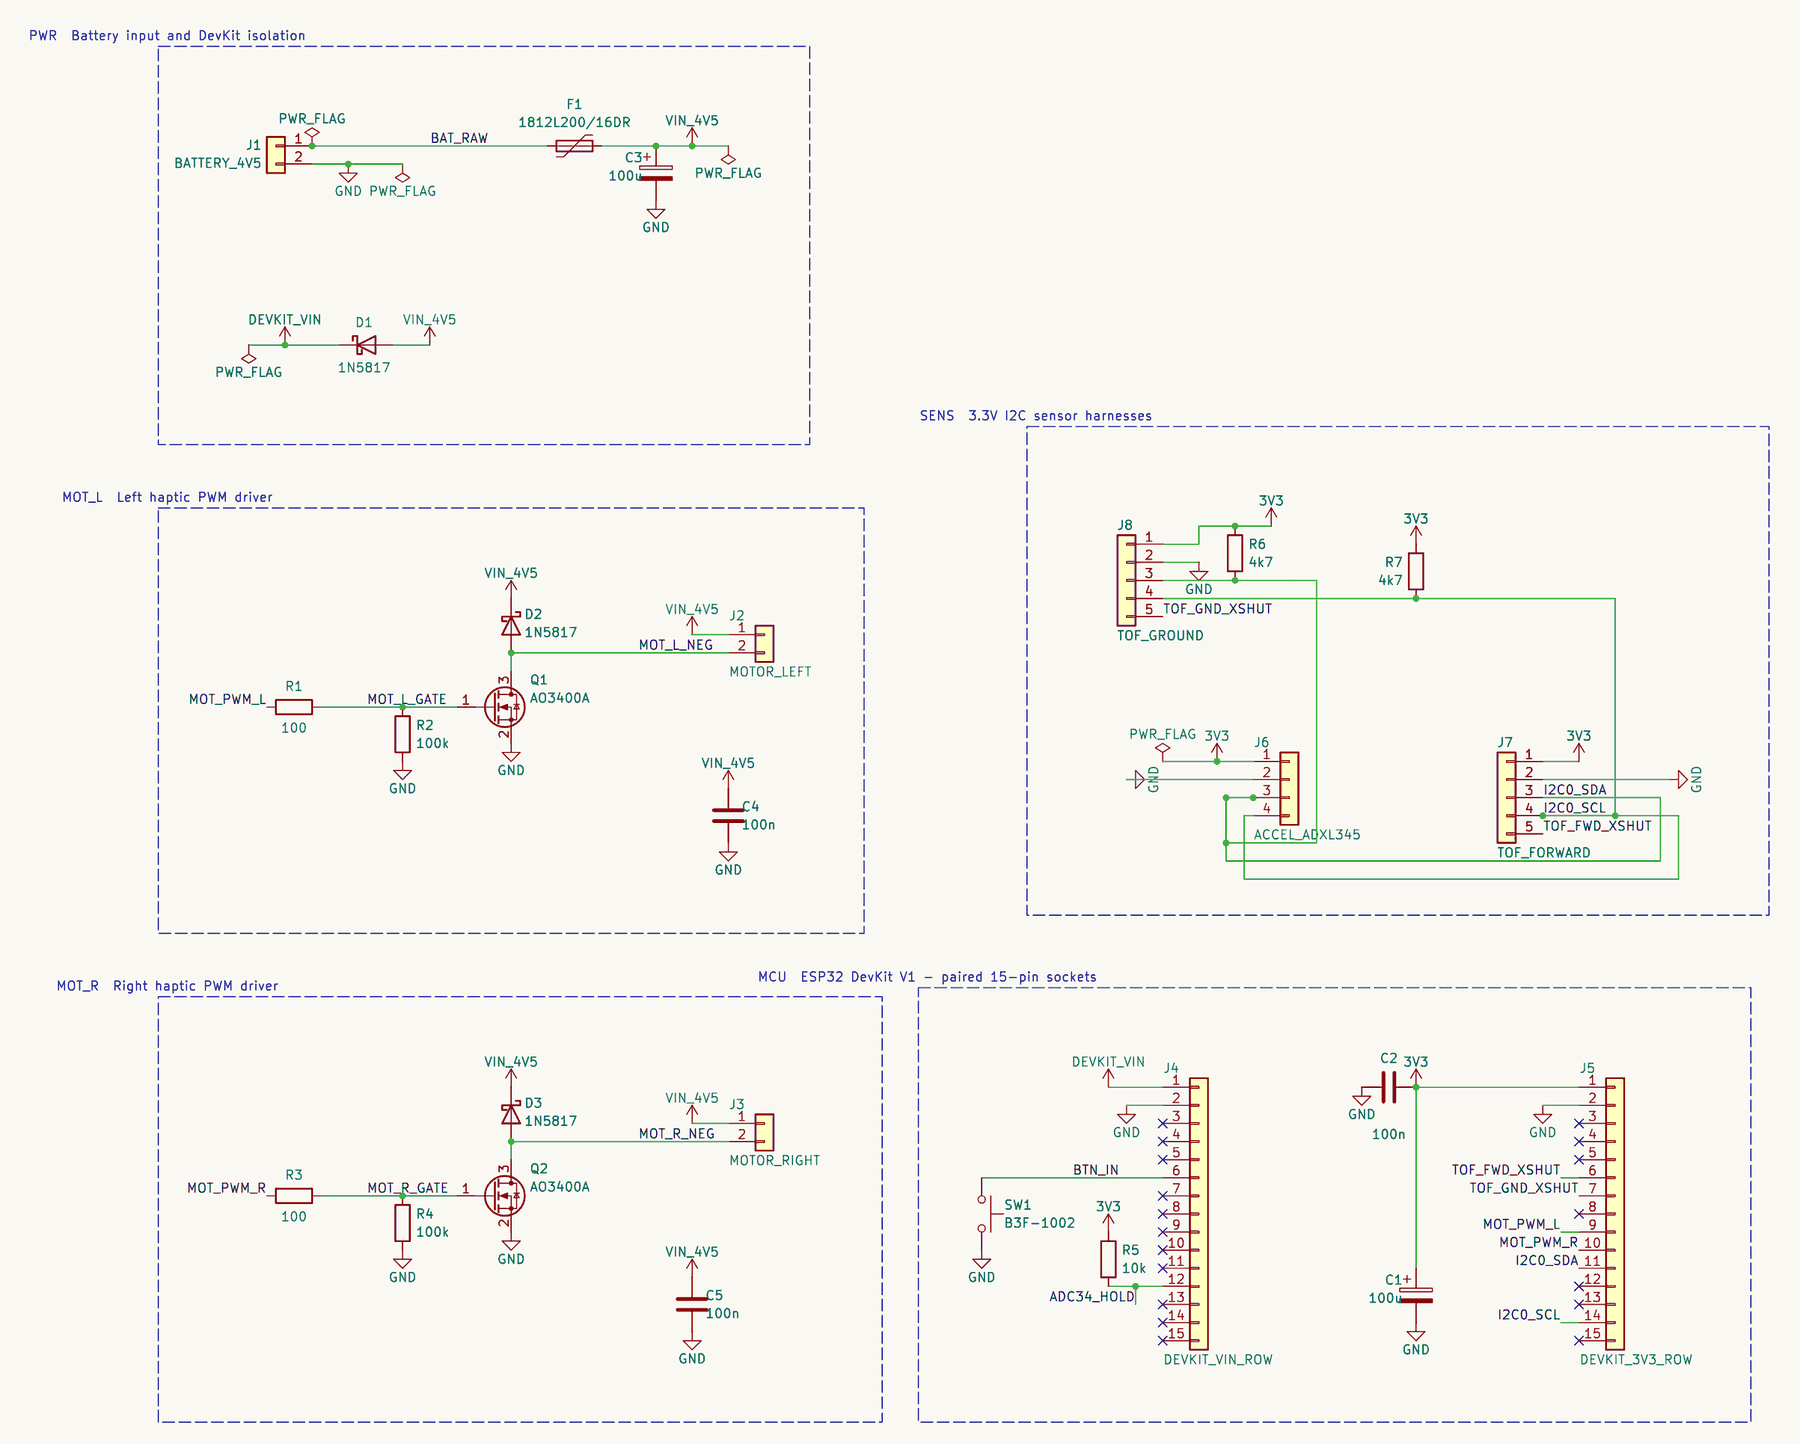
Battery input and DevKit isolation, the left and right haptic drivers, the 3.3 V I²C sensor harnesses, and the paired sockets the ESP32 DevKit plugs into. ERC: 0 errors.
Laid out around the DevKit
Before layout, the board’s constraints were set in Trace’s board prep: the outline, the mounting holes, where nothing may go, and where each connector sits. Trace generates the outline, holes, pours and keep-outs from these lines, and the finished layout keeps every part out of those zones.
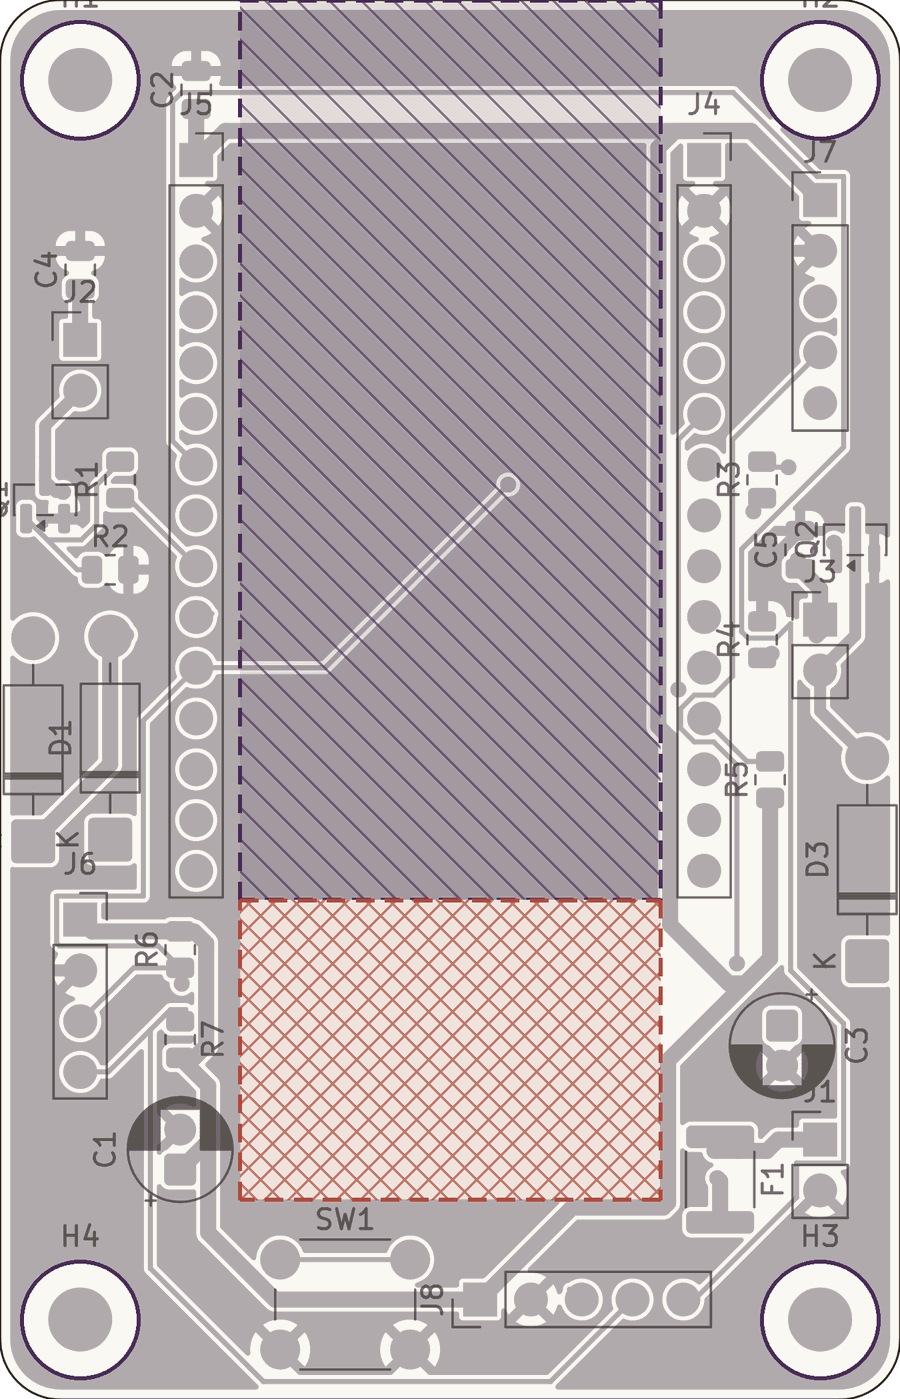
- Where the DevKit sits: no parts
- Its antenna end: no parts, no copper
- M3 mounting holes, clearance kept
- JHeaders pinned to the edges
trace_smartcane.trace_pcb · board prep (excerpt)board outline rect 45 x 70 radius 3 origin 100,80
board mount 3.2 at (4,4, 41,4, 41,66, 4,66)
board keepout mounts 3
board keepout rect 21 x 15 from 12,0 layers all
board keepout rect 21 x 15 from 12,45 layers all copper
board anchor J1 at 41,57 rot 0
And a case to print
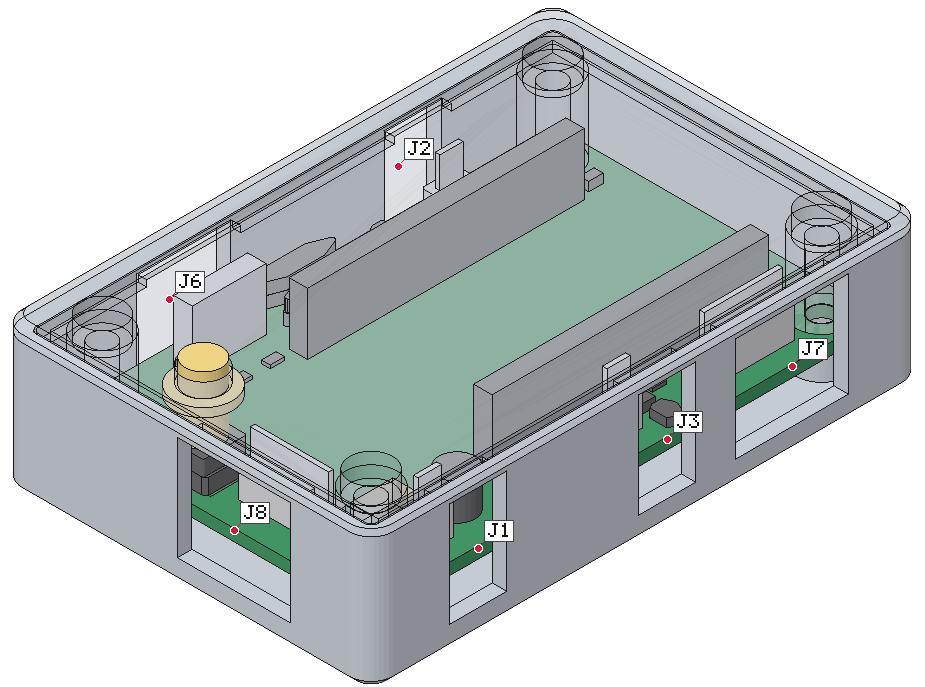
From the same board, Trace Mechanical generated a printable case: an opening for every header, M3 heat-set inserts and screws at the mounting holes, a plunger for the button, printed in PETG. All of its checks pass. We generated it from their board for this write-up, to show the step after the PCB.
What’s next
We’re manufacturing SafeRoute’s board. Congratulations, Vy and Andy. Thank you to the Columbia University Robotics Club and the MakeCU team for having us, and to every student who built with us.
Want to take your own idea from a breadboard to a real board? Download Trace.
— The Trace Team